How To Control Your Computer Using A Mobile Phone
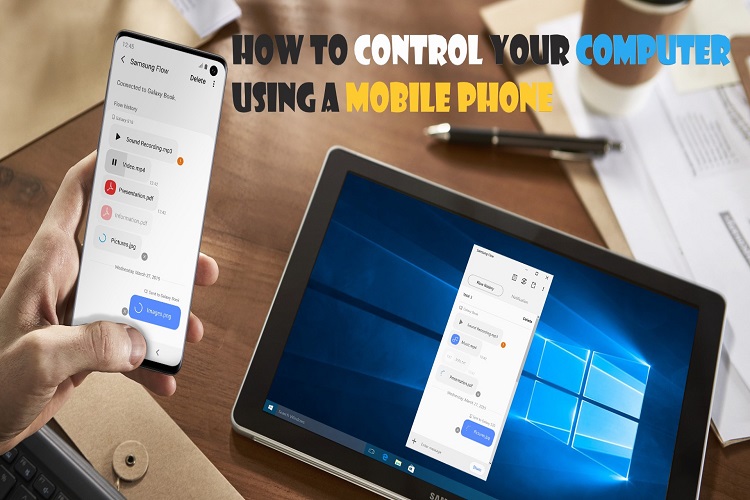
Having a remote control for your computer is advantageous in many ways. The remote control helps when you are not at home and need to access some essential files from your computer, you use a system excluding monitor, or you wish to control your home theater more easily.
To get a remote-control facility through a mobile phone, you can try a remote desktop client to gain content on your mobile or tablet from your PC. A desktop client is a good option, but using it for you may be complicated. If you are an upper-level user, you can go with it. If you consider a “mouse and keyboard” app, you will not get video or sound. After all, you will need a robust internet connection on devices to access remotely. Let’s see the fantastic tools for Android, iOS, and Windows Phone.
Google Chrome Remote Desktop
If you are an enthusiast of the Chrome web browser, using this app helps you control your PC remotely easily. To get its benefits, you will need to install the Google Chrome extension of this app on your Windows or OS X computer. Android and iPhone apps are available to access the data on your smartphonesfromyour computer.
Apart from accessing Chrome, you can access several things from your computer, feeling like you are getting the information by sitting in front of the PC. The interface of Google allows you to connect easily to your computers, even with mobile networks. You can also access the extension using other PCs’ OS.
Microsoft Remote Desktop
After a long time, you will use Microsoft’s official desktop client for accessing the PC remotely. This tool only allows you to access Windows machines. The remote access app is available for both Android and iOS and other platforms. The app also allows you to gain access to Windows Virtual Desktop using a secure channel. To get started with this tool, you will need to enable Remote Desktop on Windows 10.
Virtual Network Client (various)
Engineers and power users have used Virtual Network Client for a long time for remote access services. It is open as both free and paid for both desktops and mobile devices in a variety of clients because VNC is an open-source tool. The best way to choose the right one is based on flexibility and ease of use, depending on the situation. You can take advantage of it on both Mac and Windows. Use VNC Viewer on your Mac and TinyVNC on your Windows.
Remote Mouse
Remote Mouse provides a computer mouse and keyboard that you don’t get with the above tools. You can take advantage of this tool only on local Wi-Fi to view your computer monitor. You can download Remote Mouse for free from both Android and iOS platforms. The extra feature includes media control and the benefit of function keys. It is an excellent choice for those who want necessary access over their mobile phone or tablet.
Unified Remote
Unified Remote works mostly similar to Remote Mouse, but it combines more features than Remote Mouse. The additional features include wake on LAN support, voice commands, infrared, etc. However, this app is not compatible with Chromebooks and Chrome OS. But you can use it on Linux and Raspberry Pi. If we talk about its pricing, it is free on iOS, but you will have to pay for the Android version. Microsoft provides a free trial but charges for a full version.
Advanced options for power users If you are a power user and looking for some advanced options, you can go with Splashtop and TeamViewer. You get more features on this platform.
Harry Williams is an inventive person who has been doing intensive research in particular topics and writing blogs and articles for Fegon Group on Norton Products, Webroot Products, McAfee Products, Microsoft Office and many other related topics. He is a very knowledgeable person with lots of experience. To get in touch with the internet security service provider, just dial 844-513-4111.
SOURCE : Control Computer Using Mobile Phone
Simple Steps for Mobile Password Reset Bypass Pattern Lock and Erased Phone Data Recovery.

We all have faced pattern or password lock issues and don’t know what to do in this situation. Sometimes we’ll try to ask friends, try to find the solution online, but still don’t unlock the phone. Finally, people visit the Store for the problem. But here we are going to tell you the simplest trick to unlock the phone.
Do not worry if you have forgotten your mobile’s PIN pattern or password. Today we will tell you about the special tricks in this blog to quickly unlock your phone. Let us know about these tricks.
Most of us put passwords, pins, or patterns on our mobiles to protect our personal photos, chats, and other secret information. But we forget the password, PIN, or pattern of our mobile, after which we have to visit the Store to unlock our phone.
If your phone’s password, PIN, or pattern is forgotten and the phone is locked, there is no need to worry. We will tell you unique ways here. This will enable you to unlock your phone in a few minutes sitting at home.
Try these simple steps and unlock your phone –
- Switch off the Android smartphone which you want to unlock
- Now wait for at least one minute
- Now press the power button and – volume button together
- After this step, the phone will go into recovery mode.
- Now, click the factory reset button.
- Tap wipe Cache to clean data, which will clean the cache stored in the phone.
- Wait again for 1 minute and then start your Android device
- Now your phone will be unlocked. However, all login IDs and external mobile apps will be deleted.
Bypass pattern lock from your mobile
Most people use pattern lock in the phone, and sometimes other people try to unlock your phone without asking you, and the phone gets locked, or even you simply want to bypass the lock, this trick will surely work for you.
This trick will work only if you have an active Internet connection in a locked mobile device. If your data connection is on, you can easily unlock your device.
- Take your smartphone and draw the wrong pattern lock 5 times in it. Now you’ll see a notification that says try after 30 seconds.
- Now it will have an option to forget passwords.
- Enter your Gmail ID and password that you inserted into the locked device.
- After that, your phone will unlock.
- Now you can set a new pattern lock.
Phone Data recovery in simple steps –
We delete a lot of files to increase the memory of the smartphone, but the problem arises when a work file or data is deleted with them. Here are the simple steps to get the deleted data back from the phone –
1. If you want to bring back the deleted data of android phones, you must first install some apps on your computer. You can download the Tenorshare, UltData, Dr.fone, iMyFone, EaseUS, for this purpose. You need to route the phone to recover the data of the smartphone.
2. Now connect to your PC and install the Data Recovery app on the computer. The smartphone will then be asked to connect to the PC. You can use the USB cable to connect to pc. Now you have to give full access to your smartphone.
3.Then go to the settings of the smartphone and select the phone. This is where you will have the option of a build number. Click on this option and keep it until it shows you the option of ‘Developers On.’
4. Then go to the Settings option; here, you will find the developers’ option. Go to this developer’s option and turn on debugging option on the phone.
5. Now, as mobile connects, it will show some messages related to your access, ok the following message.
6. As soon as your mobile connects to the app, you will be asked which documents you want to recover. Select the documents you want to recover; as soon as you select and click, the application will start your work.
7. The launch of the application means that the recovery process of your smartphone has started. The process may take one or more hours as well. Keep your smartphone connected to the computer as long as the process is on. The recovery process will stop even if disconnected by mistake.
Note that this application does not guarantee that all the data on your smartphone will be recovered, but the results discovered have still been very positive.
Harry Williams is an inventive person who has been doing intensive research in particular topics and writing blogs and articles for Fegon Group on Norton Products, Webroot Products, McAfee Products, Microsoft Office and many other related topics. He is a very knowledgeable person with lots of experience. To get in touch with the internet security service provider, just dial 8445134111.
SOURCE : Phone Data Recovery
A Guide to Delete Alexa History

Amazon Alexa, or simply referred to as Alexa, is a virtual assistant with AI technology, and it was developed by “Amazon,” a well-known technology company. Amazon Alexa can be used for voice interaction, music playback, making to-do lists, streaming podcasts, setting alarms, and one can use it for several other purposes also. It also comes with the ability to control other smart devices by using itself as a home automation system. One can also extend the capabilities of Alexa by installing skills. Alexa is the best device that one can have. And as you know that every device or app that we use stores the history depicting our previous actions. And Alexa also stores a record of all your commands.
Even though virtual assistants are great because they make our lifestyle more comfortable and better, but they can record all the conversations that you don’t want to expose to anyone. So, if you don’t want to take that chance, you can consider deleting your Alexa history. Are you also a user of Alexa? Want to delete your Alexa history but don’t know how to do so? If that is the case, then there is no need to leave this page now. Here, we will show you how one can delete the entire voice history from their Alexa. To see the methods, please consider reading this complete article.
The Method to Delete the Alexa History
Any of the Alexa users can easily and quickly delete their voice recordings. While the company has assured the protection of the privacy of users on Alexa, but if you are still concerned regarding your privacy, then it’s best to delete your Alexa history. There are multiple ways through which one can perform this task. And here, we have provided you with three different methods. So, let’s move towards the first technique now:
Method 1: Deleting the Alexa History Using the Alexa App
Here’s how one can delete the Alexa history using the Alexa app:
- First of all, you will have to launch the Alexa app on your smart device.
- And after launching the app, go to the three-lined icon that you will find placed in the top-left corner of your screen.
- And now, a slider will appear on the left side of your screen. Here you will have to tap on the option of “Settings” given at the bottom of the sidebar.
- And then, scroll down through the screen and then tap on the option of “Alexa Privacy.”
- And next, choose the option of “Review Voice History.”
- Now, to delete the recording, tap on the option of “Date Range.”
- Finally, in the drop-down menu that appears on your screen, scroll down to choose the time frame to delete your Alexa recording history. And that’s it.
Method 2: Deleting the Alexa History Using an Alexa Enabled Device
One can also delete the Alexa history using an Alexa enabled device. Here’s how to do so:
- To get started, launch the Alexa app on your smartphone and then tap on the option of “Settings” given in the sidebar menu.
- And now, tap on the option of “Alexa Privacy” and then choose “ Review Voice History.”
- And next, go to the toggle switch given next to the “Enable Deletion by Voice” option. And here, you will be able to delete the recordings using your Alexa enabled device.
- And then, you will see a pop-up window appearing on your screen informing you that anybody who can access your device can delete the recordings. You can complete the procedure by tapping on the option of “Enable.” And that’s it.
Method 3: Deleting the Alexa History via Amazon Website
Here are the steps through which you can delete the Alexa history using the Amazon website:
- First of all, open any web browser on your computer system and get to the Amazon website.
- After reaching the homepage, click on the “Devices” tab.
- And now, you will have to select your echo device.
- And next, go to the “Delete Voice Recordings” option mentioned under the “Echo” menu.
- After this, a pop-up will appear on your screen asking you to confirm your action.
- At last, click on the “Delete” option, after which your Alexa recordings will get deleted.
And that’s all you will need to do to delete your Alexa recording history. All of the methods mentioned here are much straightforward and easy to follow. And that’s all we can provide you for now. Please keep following our website to get more useful information like this.
Harry Williams is an inventive person who has been doing intensive research in particular topics and writing blogs and articles for Fegon Group on Norton Products, Webroot Products, McAfee Products, Microsoft Office and many other related topics. He is a very knowledgeable person with lots of experience. To get in touch with the internet security service provider, just dial 844-513-4111.
SOURCE : A Guide to Delete Alexa History
How to Get and Use Netflix on Xbox One

The ultimate gaming console Xbox One can do several things and can even use Netflix for more fun. Xbox One is a powerful gaming console that can run heavy games and stream them smoothly. The application store of Xbox has several streaming apps, and it gives a unique streaming experience. Users can watch their favourite movies and shows through streaming apps. So if anyone is interested to know how they can start using Netflix, here’s the guide for them.
Install Netflix on Xbox One
Before getting into the steps, just make sure you have an active Netflix subscription. If you don’t have one, then you can start it just now and can enjoy a one-month free subscription. To enjoy Netflix on Xbox One, you don’t need to have an Xbox Live Gold subscription, so it makes things easier. But you must sign in to Xbox Live Gold to enjoy Netflix. Keep your internet connectivity fast to get the best streaming experience.
Once all the minimum requirements are met, just install the Netflix application from the Xbox store. But if you have already installed the app on Windows 10, then it will appear as owned on Xbox Store. So let’s get started:
- Get into the Store from the Home Screen.
- Slide down to the Apps section, and tap A button.
- Or you can slide down and tap Show All 50 to browse all apps.
- If you want to find an app quickly, then you can try out the Search app option.
- Type Netflix on the search bar, and press A to open details of the app.
- On the Netflix app screen, press A on the Install app icon.
- After the installation is complete, you can launch the app directly from there.
- Sign in your Netflix account by typing your email and password.
Add Netflix to Home Screen of Xbox One
After a recent update, Microsoft removed the feature of manually adding apps to the home screen. If you spend a lot of time on Netflix, it will automatically get added to the home screen under My games & apps section. Once the app is added to the home screen, you can pin it right there so in future it will be easy to access the app quickly. You can also create a group of similar apps by following steps:
- Choose My games & apps icon on Home Screen.
- Press A button.
- Click the Apps option.
- Now press on the three-lines of Netflix app.
- In the drop-down menu, choose Add to a group option.
- Choose Create a new group if there’s no streaming group available.
- Type a name for the group.
- Now move back to Home.
- Slide down to Add More option.
- Press on See all suggestion, if there’s no group found.
- Slide down to the Groups option, choose a new group.
- Click A button and add it to Home.
So this is everything for now to set up and use Netflix on Xbox One.
Conclusion
Great thing about the Xbox One is that it has several popular streaming apps. People who love to binge Netflix, and if they are carrying an Xbox One, then it’s better to set it up on Xbox One and get the best streaming experience, Setting up Netflix on Xbox One is nowhere tough, and probably every user can try out the process.
Harry Williams is an inventive person who has been doing intensive research in particular topics and writing blogs and articles for Fegon Group on Norton Products, Webroot Products, McAfee Products, Microsoft Office and many other related topics. He is a very knowledgeable person with lots of experience. To get in touch with the internet security service provider, just dial 8445134111.
SOURCE : Netflix on Xbox One
Top 5 First Aid Apps for Android
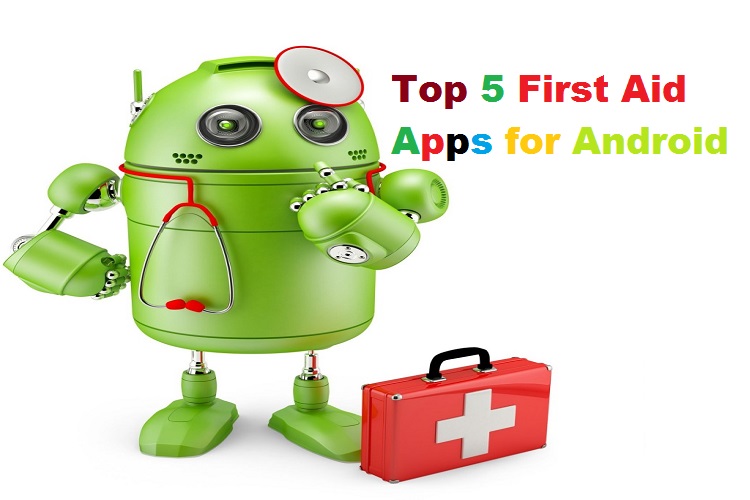
First is one of the basic skills that everyone shall know; it can help people save lives, assist a person in need, and handle tense situations. We would strongly recommend watching tutorials on YouTube or learning about first aid before using a first aid app. However, here are our top 5 picks for the first aid apps you can use on your Android device.
American Red Cross First Aid Apps
If you don’t know, American Red Cross is a US humanitarian & disaster relief organization that helps victims of catastrophes in a variety of ways. This organization has plenty of first aid apps; these apps include information about a lot of things, including bleeding, allergic reaction to burns, asphyxiation, heatstroke, and other potential emergencies. Additionally, these apps even feature a shortcut button to call 911. They work very well and are available entirely for free to use. We strongly recommend you try them.
Fat Belly First Aid
Fat Belly First Aid is an excellent first aid app that provides you with a guide to a variety of first aid techniques and situations. The app includes stuff like emergency childbirth techniques, ABC, how to deal with poisoning, CPR, etc. It has a basic user interface, but it’s a bit colorful and works very smoothly. Additionally, the app has unambiguous instructions, so you won’t face any problem in reading them. It doesn’t include video guides; otherwise, the app is really great and available entirely for free to use.
New Zealand Red Cross First Aid
New Zealand Red Cross First Aid is quite similar to the American Red Cross first aid version of the app. This app features step-by-step instructions for a variety of emergency situations, including how to deal with burn injuries, CPR, open wounds, heart attacks, and others. Additionally, it has a straightforward user interface and works fantastically. You can use either of the apps; New Zealand Red Cross First Aid or American Red Cross. They both work very nicely and will be helpful to you in almost any emergency. Both of them are available entirely for free.
Offline Survival Menu
Offline Survival Menu is quite a unique app. Well, it’s not entirely a first aid app; it features a ton of surviving techniques in the wilderness. The app includes guides on plant identification, building fire, food, water filtration, planning, and various other things. It also includes basic first aid that will help you get injured or you are ill in the outdoors. You can use this app on your camping trip or hiking. Additionally, the app works offline and is available totally for free to use.
St John Ambulance First Aid
St John Ambulance First Aid is another fantastic first aid app that provides you with a bunch of first aid techniques, including poisoning, drowning, choking, and other ailments. The app even contains information for basic stuff like CPR or the Heimlich maneuver. Additionally, it includes emergency numbers in Europe and the UK, and it follows UK protocols for first aid. The app works decently and is available completely for free to use.
Well, it’s really hard to think about what to do in an emergency situation, so having a first aid app is crucial and can be a lifesaver. We would strongly recommend installing and trying a few of the above-mentioned first aid apps on your Android device. That’s all for this article. I hope the information given above will be helpful to you. Thank you for reading it. God bless you!
Harry Williams is an inventive person who has been doing intensive research in particular topics and writing blogs and articles for Fegon Group on Norton Products, Webroot Products, McAfee Products, Microsoft Office and many other related topics. He is a very knowledgeable person with lots of experience. To get in touch with the internet security service provider, just dial 844-513-4111.
SOURCE : First Aid Apps
How To Run Android Apps On A Chromebook

Do you want to run Android apps on your Chromebook but don’t know how to do it? Keep reading this post. This post will be an easy guide for youto get Android apps on a Chromebook. Having an Android app on your Chromebook provides you an opportunity to play some popular games and to do many more things. Let’s explore the topic and learn everything about setting up a Chromebook to get Android apps.
Do all Chromebooks support Android apps?
If the Chromebook on which you want to use Android apps has been launched in 2017 or after this year, the chances are Android apps can be run. You can ensure about it in two ways. Let’s see them.
- Visit the Chromium website.
- You will see a long list of Google Play Store supported devices.
- Use Ctrl+F(on a Windows PC) to check your Chromebook using its model name.
- If your device is found in the list, you can get Google Play Store access.
If you don’t remember the model name, then, in that case, you can use your Chromebook’s settings to make sure about Google apps’ support. Here is how to check it.
- Please turn on your Chromebook and sign in to it.
- Now go to Settings cog.
- Choose Apps.
- You will have a Google Play Store option if your Chromebook is compatible with it, meaning you can use Android apps.
What to do if your Chromebook doesn’t support the Google Play Store
There are many Chromebooks that were launched in 2017 or before this year without the support of Android apps. But many of them got the support over time with a software update. If you don’t see the Play Store on your Chromebook, you should try through a software update with the latest version. Here is how to do it.
- Take your Chromebook, turn it on and sign in to it.
- Go to Settings.
- Choose the About Chrome OS option.
- Hit on the option called Check for updates.
- Follow the on-screen directions to finish the update process.
After updating the software, again go to the settings of your Chromebook and check for the Play Store support. If still, the Play Store option doesn’t appear in the settings, you should go for a new model.
Ways to enable the Play Store on a Chromebook
- Take your Chromebook and go to Settings.
- Hit on the option called Apps.
- You will see a button next to the Play Store. You have to turn the button on.
- Now you are all set with the Google Play Store to download apps. You will see it in the app drawer.
Ways to download apps on Chromebook
- Access your Chromebook.
- Find the app drawer.
- Choose the Google Play Store and let it open.
- Find an app to download.
- Hit the Install button to get the app on your Chromebook.
After installing an app, you can see it in the app drawer on the Chromebook.
Can all apps be used on Chromebooks? You may have a question in your mind about the apps used on Chromebooks. Can all apps be used on Chromebooks? The simple answer to this question is that there are some apps that are specially optimized for Chromebooks to work with full potential. You can also use an unoptimized app, but it will appear in a mobile phone format. If you use an unoptimized app, you will not get an experience like an optimized app.
Harry Williams is an inventive person who has been doing intensive research in particular topics and writing blogs and articles for Fegon Group on Norton Products, Webroot Products, McAfee Products, Microsoft Office and many other related topics. He is a very knowledgeable person with lots of experience. To get in touch with the internet security service provider, just dial 8445134111.
SOURCE : Run Android Apps On A Chromebook
How to Add Free Live TV Channels on Fire TV Stick

In this article, we have discussed the ways using which you can add free live TV channels on your Fire TV stick.
You must be wanting to add some extra entertainment to increase your smart TV experience on your Fire TV Stick.So, what would work better than adding a traditional experience like the one you have on yourset-top boxes. No, here we aren’tdiscussing about adding Kodi and live TV addons, rather we are discussing about the separate Live TV section that Amazon has brought for the Fire TV Stick users,where an individual can add free live TV channels and have their experience using the scrollable grid layout.The best part that needs to be considered is that several applications have already initiated the process to adopt the new timeline UI, and for that, they are making several changes to their timeline UI.
So,if you too want to experience free live TV channels on your Fire TV Stick in classic fashion, you can follow the steps mentioned below to add them:
Add Free Live TV Channels on Fire TV Stick
Before getting started with the steps to add free live TV channels on your Fire TV Stick, please be noted that currently, there are only a limited number of apps that have the ability to take advantage of the Live TV feature, and those apps belong to a particular region, i.e., US. So,if you are residing in the US, you can proceed further and try the Live TV feature without any restrictions.
There are a vast number of free live TV applications likeTubi TV, Pluto TV, Sling TV, and more. In this article, we will show how to add 36 free live TV channels using the Sling TV on your Fire TV stick. With that said, let’s proceed further to the steps to add free live TV channels on a Fire TV Stick:
- First, you need totap on the “Alexa” button located on your Fire TV remote and pronounce “Sling TV.”You will be redirected to the Sling TV installation page, where you need to click on the “Download” button in order to get the app.
- Once you have downloaded the app, you need to open it and further log in to it with your credentials. In case you don’t have a Sling TV account, you need to click on sign up and create an account for free. Please be noted; during the sign-up procedure, you don’thave to input any of your cards detail. Further, once you have signed in after sign up, close the website. Once your account gets created, login to it using your login details.
- Then, head back to your Fire TV Stick and proceed further by clicking on the Settings.
- Now you need to open “Live TV” and head over to the option “Sync Sources.”
- Further, add “Sling TV.”
- Then,head back and open the “Manage Channels” option.
- Now, tap on “Sling TV,” andall the live TV channels offered by Sling TV can be seen on Fire TV Stick’s timeline UI. Using a similar method, you can add another service like Red Bull TV, Pluto TV, etc. too.
So, these were the listed steps using which you can enjoy free live TV channels on your Fire TV Stick. In case a few apps aren’t appearing in the Source List, we would recommend you restartyour Fire TV Stick. If, for some reason, several live TV apps aren’t supported in your region, you can try learning how to sideload them using the third-party apps on your Fire TV Stick. That’s all from us for this article. We believe that adding free live TV channels is a prominent feature that makes Fire TV a great competitor to stock Android TV.
Do let us know about your opinion on our belief, and in case you face any issues regarding the steps mentioned above, you can comment below so that we can know quickly resolve your issue.
Harry Williams is an inventive person who has been doing intensive research in particular topics and writing blogs and articles for Fegon Group on Norton, Webroot, McAfee, Microsoft Office and many other related topics. He is a very knowledgeable person with lots of experience.To get in touch with the internet security service provider, just dial 844-513-4111.